Hi everyone! Today I'll be covering how to make your own mani/bath bombs. I actually started this project back in November (when I made these as Christmas gifts) but kept putting the post on the back burner until I had more time to perfect the recipe. Mani bombs are miniature bath bombs typically used to soak your hands. You can also make large bath bombs with the same recipe. For a small investment, you could make tons of mani bombs and customize them the way you like. I also made up some printable labels which you can get at the end of the post.
My Basic Mani/Bath Bombs Recipe:
You need a ratio of 2 parts baking soda to 1 part citric acid. If you're going to be adding any additives like kaolin clay or epsom salt, use up to 1/2-1 part. I made a small batch so here's the amount I used. If you want to make larger quantities, size up the amounts accordingly.
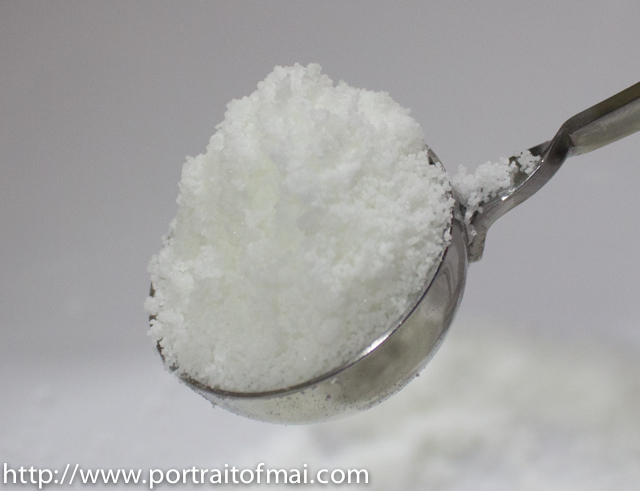
4 oz or 1/2 cup of baking soda
2 oz or 1/4 cup of citric acid. It can be difficult to find in stores but it's readily available online on Amazon
1/2 oz or one tablespoon of a melted nut butter (like shea butter or cocoa butter) or oil of your choice. I used a tablespoon of grapeseed oil.
1 tsp of skin safe fragrance oil. I'm using this Froot Loops-type fragrance oil from Amazon
(Optional) A few spritzes of water in a spray bottle to help bind it together
Other Materials Needed:
A mold to shape your mani/bath bombs. (I'm using this metal 1.25 inch diameter meatball scoop
Plastic wrap or plastic baggies to wrap the bombs in
Gloves (Suggested if you're making these as a gift)
A sheet pan or flat container to let the bath bombs airdry
Wax or parchment paper to line the sheet pan
Decorations for your container.
If you are going to be using the nut butters, you will need to use the bath bomb in warm water to melt the butters before dipping your hands or feet in. You can also use any of the oils listed below in lieu of the nut butters.
Once you get the basic recipe down, you can add any of the optional items listed below up to 1 part to the mix. You may have to add another spritz or two of water if you add any of the items below.
Optional/Substitutions:
Kaolin Clay (To make your bath bombs harder/less fragile and help prevent cracking)
Epsom Salt or any mineral salts (to soothe your skin)
Other nut butters like shea butter, cocoa butter, mango butter etc (to add moisturizing qualities)
Other oils (like sweet almond, coconut, grapeseed oil, etc to also add moisturizing qualities)
Food Coloring (if you want different colored bath bombs)
Instructions:
1. To start, line a baking sheet or metal sheet with wax or parchment paper. Measure out all the ingredients you'll need.
2. Now you have two options. You can either make these in a bowl with a whisk or use a food processor. Both will get you the same result but it'll come together much quicker in the food processor. For a small batch, I use a bowl but if you're making a larger batch I suggest a mechanical method.
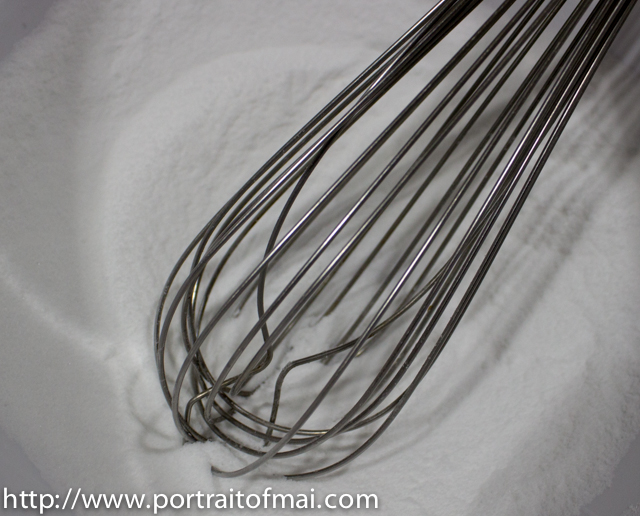
3. First, mix the dry ingredients together. In the food processor, you can just use a few pulses to mix the citric acid and baking soda. In a bowl, you need to use a whisk or a sifter to incorporate the ingredients and get the lumps out. Citric acid is especially prone to clumping so it's vital to get it incorporated well.
3. If you're using a nut butter, measure it out then melt it in the microwave on low. Make sure it doesn't boil. If you're using an oil, measure it out. Then mix the fragrance oil with the oil or nut butter. Once all together, start pouring it into the dry mixture slowly. If you're using the food processor, pour it in while it's blending. If you're making it in a bowl, stir to incorporate everything together as you pour.
4. Now the next step is vital. You need to keep mixing until everything is incorporated and there are no lumps. . Using my whisk, I honestly kept mixing for about 10 minutes because I wanted to be sure it was mixed. If you think you're done mixing, mix for another 2 minutes. This step is easy in the food processor. The mixture should look like fluffy snow (seen below) but feel like damp sand. If it's not wet enough, add a spritz or two of water and continue mixing. I personally did not need to do that.
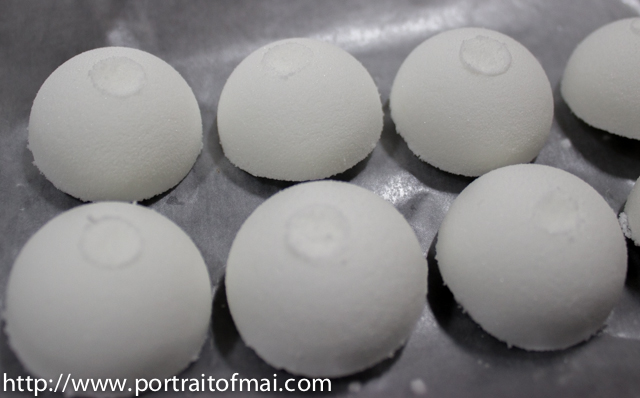
5. Once mixed, fill the mold you're going to use. You need to pack the mani/bath bombs tightly to help prevent cracking as they dry. Overfill the mold and press it down firmly. The first time I did it with this recipe, I was able to get 12 out of my mix but some had started cracking. The next time I did it, I packed it as tight as I could and only got 10 but they didn't crack.
6. When you're done, set them aside to dry and don't touch them till the next day. Once fully dry, you can wrap them in plastic wrap or in plastic baggies. You want to make sure you store them in a cool dry place to keep them fizzy. Here's what mine looked like while they were drying.
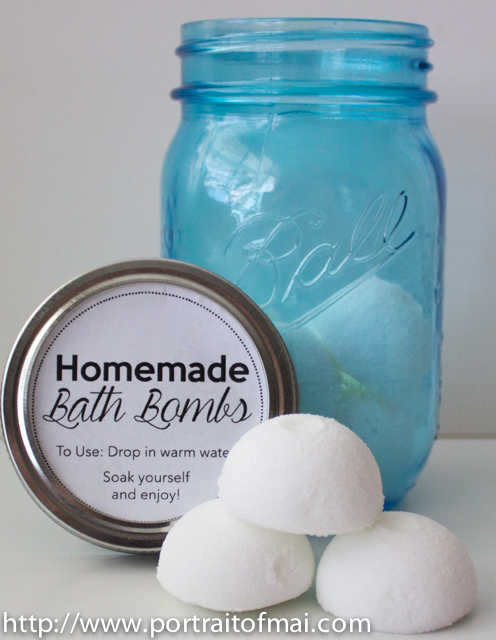
After they dried, I originally stored them in a mason jar but I suggest you individually wrap these in plastic wrap or store them in plastic baggies. You can still use the labels I made below with spray adhesive. I'm super pleased with how they turned out and I'm happy to add the mani bombs to my nail care routine.
If you're not able to mold these, stash the loose mixture in a bag or jar and keep them as crumbles! Add in some epsom salt for extra soothing purposes and use them as you would have had you not molded them.
Troubleshooting:
If you're having some problems with your mani/bath bombs, I highly suggest checking out this post by Kirby at The Mercurial Magpie. She recently made her own DIY post on Mani/Pedi Bombs and has a ton of great tips! Here are a few troubleshooting issues I came across too.
Difficulty with cracking: If the bath bombs initially turn out fine but start forming cracks, there are two reasons why it's happening. 1. You've added too much oil or water to the mix. 2. You're not molding them with enough pressure. You need to be sure to pack the mixture as tightly as possible so they form into a cohesive ball.
Difficulty with sticky or large "pimples": If your bath bombs start having large "pimples" of moisture coming to the surface as it dries, there are two reasons why it's happening. 1. The fragrance oil you've used didn't incorporate completely in the mixture. Be sure to combine the all the oils together before adding it to the mix. 2. You've added too much oil or water to the mix. Next time, reduce the amount of oil (by 1/4 or 1/2).
Gift Idea:
1. Purchase some square foil that is usually used for decorating chocolate (found at your local hobby supply store). You can wrap the foil around each mani bomb and stack it in the mason jar.
2. A package of paper candy cups will make them look like cute bon bons.
Here are the labels you can use if you decide to give these as gifts. These are free for personal use. Here's how each of them look:
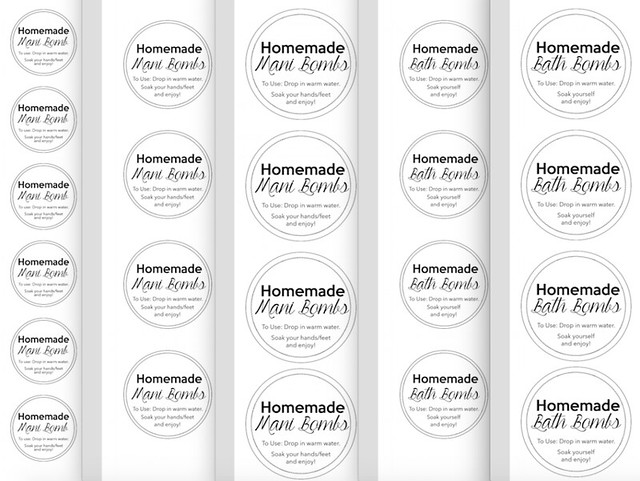
You can print these out on paper and glue them to cardboard tags that you tie to the container. Or you can print these on sticker paper and use it to decorate bags of the mani/bath bombs.
I hope this recipe and free printable labels has been helpful to you! I'd love to see pictures if you decided to make any of your own!


No comments
Thank you for commenting, I love reading every single comment and try to respond to each! Please do not leave your blog link or url in your comment. If you'd like me to check out your blog or if you have a question for me, feel free to contact me via my Contact Me tab.