Featured Slider

Showing posts with label Comparison. Show all posts

Glossier Brow Flick vs. Ardell Stroke a Brow: Review, Swatches, and Comparison

I Purchased This Affiliate Link

Hey everyone!

Today I have a review and comparison of the Glossier Brow Flick to the Ardell Stroke a Brow. I learned about the Ardell Stroke a Brow from Katie Jane Hughes and seeing how well the product worked on her. Soon after I got the Ardell, I found out that Glossier was going to be coming out with their own liquid brow pen though it was unclear when it would actually launch. Considering Ardell Stroke a Brow was a staple product of Katie Jane Hughes and how she collaborated with Glossier with Brow Flick, I thought it'd be useful to compare it to the two.


Glossier Brow Flick vs. Ardell Stroke a Brow Comparison

I have the Ardell Stroke a Brow in Soft Black and the Glossier Brow Flick in Black.


Glossier Brow Flick vs. Ardell Stroke a Brows Closeup

I tried to be as in depth as possible and have included swatches, compared the packaging, pricing, and tested the wear. Continue for more information...


Glossier Generation G: New vs. Old Formula Swatches, Review, and Comparison

I Purchased This Affiliate Link

Hey everyone!

As the title suggests, I'm going to be talking about Glossier's latest reformulation of their Glossier Generation G's, their sheer matte lipstick. This is the third formulation of the Generation G's and along with a tweak to one of the shades (Leo), there's been a long asked for update to the packaging and formula. I have the second formulation and packaging and got the new formula to compare.

Glossier Generation G New vs. Old Tubes

Glossier Generation G: New vs. Old Comparison

Interested in reading the comparison? Click through to read more!

Colourpop Brow Boss Gel vs. Glossier Boy Brow: Comparison, Swatches, and Review

I Purchased This Affiliate Links 

Hey everyone!

Today I wanted to talk about Colourpop Brow Boss Gel. Colourpop has been expanding their brow range over the years, coming out with different brow pencils and brow pomades but they only had a clear brow gel for the longest time. Now they finally listened to consumers and released colored versions of their Brow Boss Gel. I love a good brow gel and given that they made one in the shade Soft Black, I was down to try it.

Given that the original Brow Boss Gel sounded like a dupe to Glossier's Boy Brow, I decided to compare it to the Boy Brow in Black and see how similar it really was.
Click through to see my review, see swatches, and a comparison of both!

Colourpop Ultra Blotted Lips vs Stila Stay All Day Sheer Liquid Lipstick: Review, Swatches, and Comparison

Hey everyone!

Today I have another Colourpop vs. ___ comparison, this time swatching, reviewing, and comparing the Colourpop Ultra Blotted Lips in Doozy, Party Wave, Slide, and Zuma vs. Stila Stay All Day Sheer Liquid Lipsticks in Sheer Ballerina. These are both liquid lipsticks touting a sheerer/lighter coverage finish in contrast to the typically opaque finish to liquid lipsticks.

From top to bottom: Colourpop Doozy, Party Wave, Slide, Zuma, and Stila Sheer Ballerina


Colourpop Ultra Blotted Lips vs Stila Stay All Day Sheer Liquid Lipstick

The Colourpop Ultra Blotted Lips came out first, launching in 2016 while the Stila Stay All Day Sheer Liquid Lipstick launched in 2017. I can't think of any brands doing a sheer liquid lipstick before the Colourpop Ultra Blotted Lips, I feel like they were the first (though feel free to correct me if I'm wrong).

If you're wondering what the difference between a liquid lipstick and a lip stain are, here's a quick comparison
  • Lip Stain: Usually water-based, "staining" or coloring your lips, lightweight, translucent 
  • Liquid Lipstick: Usually hydrocarbon based (like isododecane), adds a layer onto your lips instead of coloring it, not intended to stain your lips (though some can stain it another color due to the pigments used)
I'm not usually a fan of lip stains because the water-based formula can be drying and I don't like having to try to scrub off the stain at the end of the day. I like the idea behind a sheer liquid lipstick, having the longevity without it looking so heavy like a typical liquid lipstick. 

Click through to read my thoughts on both formulas, see swatches, and which I prefer!

Colourpop Blotted Lip vs Glossier Generation G Lipstick: Comparison, Review, and Swatches

I Purchased This Affiliate Links

Hey everyone!

Today I have swatches and a review of the Colourpop Blotted Lip and a comparison to the Glossier Generation Gs. The Glossier Generation G Lipsticks were released in 2016 to the delight of many people searching for a low-fuss sheer matte lipstick. I reviewed two shades on the blog, Cake and Leo before on the blog. 

Almost a year later, Colourpop released their Blotted Lip as part of a collaboration with Alexis Ren. The Blotted Lip was described as providing a sheer matte finish that's buildable and lightweight and given how much I liked the Generation Gs (at least in Cake), I thought I'd get the Blotted Lip and compare the two (and it turns out they share quite a few similarities) and see if it could be considered a dupe of one another.


Colourpop Blotted Lip vs Glossier Generation G Lipstick

Continue reading to hear my thoughts, read the comparison, and see swatches!

BH Cosmetics Foil Eyes Palette - A Dupe for the Makeup Geek Foiled Eyeshadows?

I Purchased This Affiliate Links

Hey everyone! Today I have a review of the BH Foil Eyes Palette. I first learned about this palette on Instagram when it was being touted as a dupe for the Makeup Geek Foiled Eyeshadows. The palette itself only costs $12.00 whereas a single Makeup Geek Foiled Eyeshadow costs $10.00 I really like the Makeup Geek Foiled Eyeshadows but I'm down for anything that can emulate it for a fraction of the price.

BH Foil Eyes vs. Makeup Geek Foiled Eyeshadows

Visually, the colors seem very similar to the Makeup Geek Foiled Eyeshadows line, but are they truly similar? Click thru to see my swatches, read my review, and see a comparison.

New Makeup Geek Blushes: Swatches/Review and Formula Comparison

I Purchased This Affiliate Links

Hey everyone! 

I've been a little radio silent on the blog for a few weeks after my graduation but that's because I landed a job! The great news is that it's exactly the kind of setting that I've wanted to work in but the bad news is that I have to move so I've been busy prepping for that. I have four to eight weeks of downtime until I actually start since I have to wait for my license, which gives me some time to enjoy my summer before work starts. I hope you enjoy the upcoming posts while I have some free time!

Today's post is a review of three Makeup Geek Blushes I picked up while at PHAMExpo. These blushes are their revamp of the blush formula. I got Heart Throb, Infatuation, and Summer Fling. I also have Summer Fling from the old formula so I'll also be doing a comparison of the old vs. new formula and share my thoughts on any differences I see. 
New Makeup Geek Blushes

Continue reading to see my swatches, read my review, and my comparison between the old vs. new formula.

REVIEW, COMPARISON, VIDEO + GIVEAWAY: Real Techniques Collector's Edition Eyelining Set

Press Sample

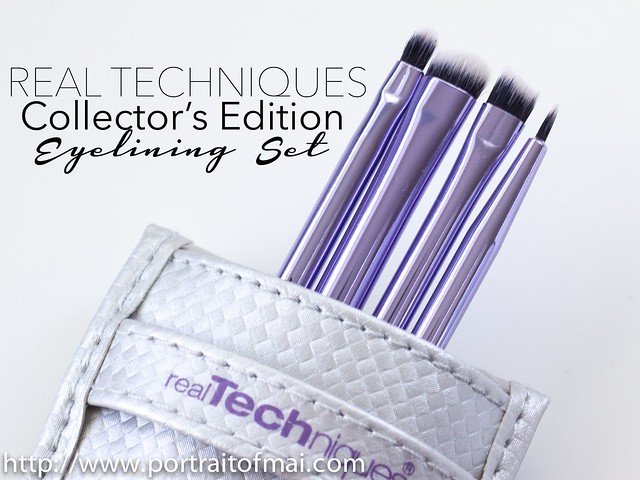
I'm very pleased and excited to review this Limited Edition Real Techniques Collector's Edition Eyelining Set of brushes. Despite the name, you can use this for other eye makeup related purposes like applying eyeshadow or eyebrow powders. 

Spoiler alert: I really like this set and I like it because it's what I always wanted their Starter Set of eye brushes to be. I'll give a full review below (you can watch the accompanying Youtube video or read the review) but I want to seriously recommend this brush set for anyone who prefers using smaller eye brushes or has a smaller eye shape.

Be sure to read towards the end where I'll be giving away one of these sets!

real-techniques-collector's-edition-eyelining-set-edited-2-final

Hakuhodo G5526 Eye Shadow Brush Review/Comparison to MAC 226

I Purchased This 

For two years now (ever since I first saw them at The Makeup Show LA 2012), I've been hemming and hawing over Hakuhodo brushes. They are the creme de la creme of makeup brushes but each time I went to a show, I would end up chickening out. Well this year at PHAMExpo, I made a decision and got myself one Hakuhodo brush, the G5526BkSL.

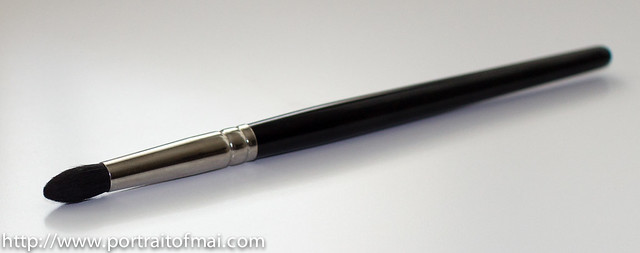
The G5526BkSL is part of the G series, which contain brushes that are usually a mix of black blue-squirrel and goat hair (which is why it's denoted with BkSL) though the G5526BkS has horse hair bristles. The G5526BkSL was only $20.00 and in the grand scheme of brushes, it's actually not as expensive as you might think.

I was in between the G5526BkSL and the J242G (which looks similar to the MAC 239), but decided on the G5526BkSL because I couldn't pass up on a brush that looked so close to my beloved MAC 226. While I adore the shape of the MAC 226, it's just not as soft as MAC brushes usually are and I wanted the Hakuhodo version without the scratchiness. I do own both brushes so I'll review the G5526 first then compare it to the MAC 226.

The handle is black and sleek but unfortunately the name or number isn't embossed on the brush, just the brand's name.

The G5526's shape is unique because it's the result of crossing a pencil brush and a fluffy blending brush. The top of the bristles comes to a soft point which allows you to apply eyeshadow in the crease with precision or use the edges to widely blend out a crease color. I prefer using the tip of the brush for drawing out the beginning of a cut crease and using the sides of the brush to blend out the edges. I've also been able to use the sides of the brush to pack on eyeshadow onto my lid.


hakuhodo eye brush (1 of 1)

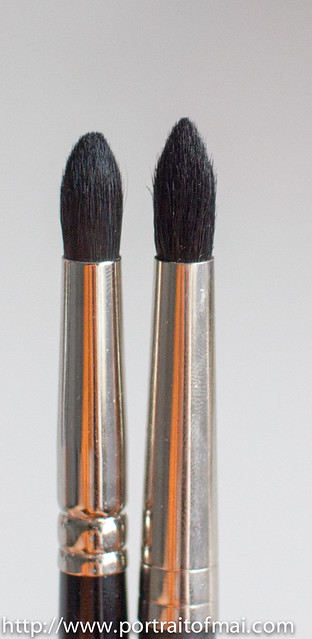
Here's a comparison to the original MAC 226. I say original because the rereleases of the brush have never quite lived up to the first release. The G5526BkSL has a similar shape but the MAC 226 comes to a sharper point and has a less rounded shape overall but the MAC bristles are much more scratchy. The Hakuhodo brush on the other hand is extremely soft, the bristles feel luxurious on my eyes and it makes for such a wonderful application.


hakuhodo brushes (4 of 4)

In summation, I'm extremely pleased with the brush. The brand and the brush live up to the hype in my opinion. I've been able to use the brush in my crease and to apply eyeshadow on my eyelid. It's been brilliant for the smokey eyes I've been preferring lately and can be a great pick for anyone seeking the dual purposes of the precision of a pencil brush and the blendability of a fluffy brush.

Do you own any Hakuhodo brushes or any similar brushes? Do you think you might invest in one?

Disclaimer: I purchased this brush myself. All opinions are my own. I'm not being compensated for this post.

OCC Cosmetic Colour Pencil Swatches, Comparison, and Review *Revised*

Press Sample Affiliate Link

Along with the lip tars from the Spring 2014 Plastic Passion Collection, I was gifted the set of Cosmetic Colour Pencils (CCP). I'm going to swatch, review, and provide comparison swatches between the original lip tar and the counterpart cosmetic colour pencil.  I don't own all the lip tars but I do have five that I can compare the pencil versions to. Along with that, I will show the lip looks you can get by layering the lip tars with the counterpart pencils! I will not be reviewing the Anti-Feathered Cosmetic Colour Pencil in this post, instead I'll be testing it separately to see how well it performs at preventing feathering.

occcosmeticcolorpencils-4

From top to bottom: Anti-Feathered, Feathered, Anime*, Sybil, Pennyroyal, Trick*, Tarred, Black Dahlia*, Hoochie*, NSFW*, Pool Boy, Grandma*

*Indicates that these are only lip and body safe. The rest of the shades (Feathered, Sybil, Pennyroyal, Tarred, and Pool Boy) are eye, lip, and body-safe.

I have quite a bit to say so I'll be putting the rest of the post under a cut!

Sugarpill Limited Edition @#$%! Eyeshadow Swatch, Review, and Comparison

@#$%! is a Limited Edition color that was available at IMATS LA. It is Limited Edition but I can't say for sure whether it will be available elsewhere. I originally thought it was just like Love+ with silver glitter, but further swatches show that it is actually different from Love+. I love anything Sugarpill so I had to get my hands on it. By the way, @#$%! is NOT vegan as it contains carmine.

@#$%! is a cool toned berry red with lots of silver glitter.

Sugarpill @#$%!

This swatch was done dry over Too Faced Shadow Insurance and taken in natural daylight.

Sugarpill @#$%! Swatch

It shouldn't be any surprise that I'm kind of obsessed with Sugarpill and it certainly shined through when I was doing a little investigating. When I got @#$%! home, I realized that I might have seen the color before. I will direct you to this video by Enkore of his IMATS 2010 Haul where he showed off a berry red Sugarpill eyeshadow. I thought it looked really similar to @#$%! so I tweeted Sugarpill about whether it was the same color. Turns out I was right, the color in the video IS @#$%! and it was originally going to be in a palette but then they changed their mind.

Like I said, I originally thought it was going to be like Love+ with silver glitter but it's not and here's a comparison of Love+ and @#$%! so you can see the difference.

Love+ on the left, @#$%! on the right.


.
Sugarpill Love+ vs @#$%! Eyeshadow

Close, but no cigar. Love+ is more of a primary red, there's a slight sheen to it, and there's no glitter.

I am unsure about the official availability so I don't want to make any promises about anything, be wrong, and have Sugarpill take the brunt of peoples' reactions to it. I do like it for sure because I think the cool toned berry red is pretty. Do I think you missed out on much? Eh, not really. (Am I saying this because you might not be able to get your hands on it? Possibly.) I wasn't able to find anything else in my collection that looked similar but I will keep searching for a dupe! I may or may not have picked up an extra one for something special coming up soon ;)

Do you like @#$%! ? (How does one pronounce that anyway?)

Disclaimer: I purchased this with my own money at IMATS LA.

Drugstore Dupe Alert: Revlon Emerald vs Urban Decay Junkie 24/7 Liner

When I saw this post by Blushing Noir with her swatch of Revlon's Grow Luscious Emerald liner, I thought it might be a viable dupe for Urban Decay Junkie 24/7 Liner. I've been obsessed with Junkie ever since I saw it featured on Mu-Tokki but it isn't available from Urban Decay other than in their Holiday 2011 Electric 24/7 Travel Size Set of 5. While Emerald isn't a perfect dupe, for Junkie, I do think it's close enough though to stave off cravings for the more expensive Urban Decay liner.

.

A comparison of the two pencils, Junkie on the left and Emerald on the right. Both are in a plastic barrel as opposed to a wooden barrel.


Urban Decay Junkie vs Revlon Emerald

The left scribbly swatch is Revlon Emerald, right scribbly swatch is Urban Decay Junkie. The left single swipe is Emerald and the right single swipe is Junkie.

Revlon Emerald vs Urban Decay Junkie

A closeup of the scribbly swatches. Though it looks like the Emerald is sheerer than Junkie, it actually turns out that Emerald is more pigmented in one swipe when applied on the eyes. Emerald and Junkie have a very similar colored base but the reason that Junkie looks bluer is because Emerald has a higher concentration of the sparkle that makes it appear the slightest bit more green. Though the difference looks quite drastic here, it isn't as prominent when worn on the eyes.

Revlon Emerald vs Urban Decay Junkie

I applied both on my eyes so you could see just how subtle the differences are when worn. Emerald is on the upper lashline, Junkie is on the lower lashline.

.

I think the two are so similar, but I do like the slightly bluer Junkie. Junkie does have its downsides because it is sheerer in one pass (but can be built up to similar opacity) and can't be purchased on its own quite yet (only in the Holiday 2011 Kit on Urban Decay) so its availability is quite restricted.

Emerald on the other hand is pigmented in one swipe, readily available at any drugstore, $8.99 for .04 grams and often goes on sale (I got it for 40% off this week at Rite Aid). As an added benefit, Emerald is a Grow Luscious liner with a formula that is supposed to "help support healthy lashes" though I don't necessarily give much credence to that. If you don't have a Rite Aid nearby, you can get it on Amazon for about $5!

I usually don't like to wear pencil liners because they transfer a little more easily on my oily Asian eyes when I wear them on my upper lashline (which are slightly hooded). The Revlon liner makes no mention of wear time which was troubling at first because I thought it meant that it would have virtually no wear time. It turns out though that it fared quite similarly to the Urban Decay 24/7 liner on me (your mileage will definitely vary, it always seems like the products that last amazing on everyone is less impressive on me because of my eye shape)

With or without primer (I used Too Faced Shadow Insurance), both lasted about 4 1/2 hours before I started seeing the slightest hint of transfer on my eyelid (and I do mean the slightest hint, I was looking hard). Wear time is much better if I wear eyeshadow underneath the liner (over 8 hours).

I hope you guys found this post useful! Thank you so much to everyone wishing me luck on my finals :D I managed four A's and one B this semester (the 2nd B I've ever gotten in college) and I may or may not have rewarded myself with a Fyrinnae order that I'll be posting about tomorrow :X (I had a gift card from Klout so really, I didn't pay anything out of pocket!)

OCC Lip Tar's New Packaging & a Comparison between Sleek Pout Paint

I'll cover my experience at The Makeup Show soon (and eventually that pressing powders troubleshooting post) but I really wanted to post about the new OCC Lip Tar packaging as soon as I could.

Here's the OCC Lip Tar in Anime, I really wish I could have captured the bright neon color, my camera couldn't take it!

.

Anime isn't this berry looking, it's much more neon in person but you can see the awesome new nozzle tip.

.

When I was at The Makeup Show LA, I made a beeline for the OCC Makeup booth and was kindly introduced to the founder, David Klasfeld, who is SO nice and easy to talk to. I knew about the new packaging so I asked him a few questions about the packaging change and their reasons behind it.

He explained that the change in lip tar packaging was meant to coincide with the change in their branding from a makeup artist brand to a more consumer brand. As it became more popular with consumers, people were getting confused about the slant tip applicator and were thinking that it was a lipgloss that you could apply straight from the tube. The slant applicator wasn't much of an issue with makeup artists since most would use brushes to apply the product in a sanitary matter . I also heard that the slant tips were prone to breaking off and leaking so I imagine this'll help combat that problem. The nozzle should help to discourage usage without a brush and you can also have better control over the amount of product squeezed out.

The price of the lip tar was increased from $13 to $14 I believe, BUT you get 25% more product (going from 8 mL to 10 mL). All in all, completely worth it since I know that tons of people are fans of the OCC Lip Tar.

I happen to own the Lip Tar's most well known comparative product, the Sleek Makeup Pout Paint, so I wanted to do a quick comparison between the two and their packaging. I can't compare formulas since I won't be using the OCC Lip Tar I got but I can compare the scent.

The Sleek Pout Paint retails for £4.99 in the UK but $8.00 on the Sleek Makeup site for 8mL, working about to be about $1 a mL. Shipping with the Sleek Makeup site is a ridiculous $13.50 for anyone interested in importing them from the US so I'd suggest finding someone to CP them for you. The OCC Lip Tar retails for $14.00 after the slight price and larger size increase, working out to be $1.40 a mL and shipping from the OCC site is $7.50 however there are other vendors and shops that sell them (plus their store in NYC!). Sleek Pout Paints have a limited color range versus OCC's massive amounts of Lip Tar colors but I don't think it'd be an issue for the regular consumer.

.

You can see here that the diameter of nozzle for the OCC Lip Tar is slightly smaller than the nozzle for the Sleek Makeup Pout Paint.

.

The OCC Lip Tar smells of mint whereas the Pout Paint smells a little like orange and plastic. I personally prefer the scent of mint but it's your preference!
You can google search for more comprehensive reviews of the formula but between the two, I'd take the OCC Lip Tar. It's much more available for me in the US and I quite like the minty scent.

Anyway, I hope this has helped show the difference between the Pout Paint and the Lip Tar since I figured the two might be compared even more now that the packaging has changed.

Do you own a Lip Tar, Pout Paint, or both? What do you think about it?

MAC Hot 'N' Saucy Tendertone-Swatch, Review, & New vs Old Comparison

I've basically waited for years for the Tendertones to be repromoted by MAC and so when I went to the MAC Shop MAC, Cook MAC Event (event pictures and recap here!) I had to pick one up. I went back and forth on which one to get but decided on Hot 'N' Saucy. I may go back for one of the other ones though, depending on whether I want to stick to a makeup detox for the month of February.

Hot 'N' Saucy is described as a "soft cherry red" and that's pretty accurate. Tendertones are sheer though, so don't expect to get tons of color payoff with the product. Out of the four shades being released with the collection, I think Hot 'N' Saucy was the most pigmented one. These retailed for $15 and have 6 mL or 0.2 oz of product.

Unfortunately it seems that Hot 'N' Saucy is sold out on the MAC website but I checked and you can still purchase it on Nordstroms and Macys!

.

To go with the MAC Shop MAC, Cook MAC theme, these came packaged with a matte pink gingham sleeve

.

and the back of the paper sleeve. I was hoping that they would be packaged in this versus it only being a sleeve, but I suppose I can't complain.

.

The actual box is shiny, with an opalescent Mother of Pearl-esque finish with MAC embossed on it.

.

The Tendertones come in a glass pot like the MAC Paint Pots with a black lid. I'll talk about the lid later in the post when I compare this new Tendertone to the old Tendertone I own. These also have a pleasant scent to them, I'd say a fruity strawberry kiwi scent. Very summery and one of the biggest reasons why I love Tendertones. My Tendertone from 2008 still smells fruity!

.

Lip Swatches Time! I did a heavier layer on my lips to show off the color better and this was taken in natural daylight.

Bare Lips

.

Hot 'N' Saucy Tendertone.

.

I also made a gif to better show the difference between bare lips and post application.

how to make a gif

It is a heavier application but I do like the sheer coverage on my lips. It's got a real shiny finish to it that lasts for several hours (about 3-4 on my lips). I absolutely love it on.

I wanted to take this time to compare my old Tendertone from the 2008 Tendertones Collection to this new Tendertone that came out. I do wish I had Hot 'N' Saucy from the 2008 collection to do a better comparison but I only have Sweet Tooth so I'm going to be comparing the two for any differences in packaging and scent.

New Tendertone on the left, Old Tendertone on the right.

.
.

At first glance, it seems like the only differences are in the stickers. The new Tendertone has a larger black sticker that covers the bottom of the jar whereas the old Tendertone has a smaller white sticker that only partially covers the bottom. The jars are similar to the paint pot jars with a glass jar bottom and a black screwtop lid. I didn't notice a difference in the shine or scent, which was actually my biggest worry, I thought they might have changed the scent in between the 2008 versions and this year's version.

Now a big reason why I enjoy the glass jar with black lid packaging is because the lids feel substantial; when I unscrew the jar, it makes this pleasant, enjoyable sound as the lid slides against the threads of the glass jar and the sound is present in the old Tendertone packaging.

The new Tendertones come with a black lid that is virtually indistinguishable in appearance from the old Tendertone lid but it's actually lighter in weight and it feels like it was made out of a cheaper material. The difference in weight makes it so there's no satisfying sound when you open and close the container. As someone who enjoys the sounds and weight of the old lid, I'm disappointed that they switched over to one that feels like cheap plastic. The plastic has a much smoother/slicker feel to it versus the old one which almost felt like it had a semi matte feel to them.

I don't own any of the recent Paint Pots (which have the same packaging) so I can't comment on whether the change in lid is only present in the Tendertones or whether it's a change that they slowly implemented without any warning. I may explore my local MAC counter to check if there have been any changes and report back on that.

I'll admit, discussing the weight of the lid is rather nitpicky, but that's what I'm here for!

Packaging aside, my MAC Tendertone was everything I have been waiting years for. My only complaint is that they only released four colors. I'm hoping that maybe they'll come out with more soon! I did like the look of Tread Gently, which was a sheer green Tendertone that also came out. It really reminded me of Spring Bean Lustreglass which I believe is a long discontinued color. Ignore me! Rach from The Beauty Spot set me straight and it's actually permanent! Spring Bean is this green lustreglass than when mixed with your natural lip pigmentation, sort of turned itself into this gorgeous caramel color with green sparkle. I'm really thinking about getting it.

So get a Tendertone while you can!

MUFE Aqua Creams vs Maybelline Color Tattoo Eyeshadow Comparison

I just wanted to do a quick post comparing two of the Make Up For Ever Aqua Creams with the two Maybelline EyeStudio Color Tattoo 24HR Cream Gel Eyeshadow (Is that not the longest name ever? MUFE puts it rather succinctly into two words but Maybelline had to take up seven?).

I do own three of the Maybelline cream eyeshadows, Bold Gold, Pomegranate Punk, and Tough as Taupe (review and 24 hour experiment pending!) but none of the eye/cheek safe colors are matte or similar to Tough as Taupe so I didn't have anything to compare to. Just for reference, the Aqua Creams come with 6 grams of product for $22 ($3.67 per gram) whereas the Color Tattoo Eyeshadows come with 4 grams of product for $7.49 ($1.87 per gram).

I compared Aqua Cream #11 to Bold Gold and Aqua Cream #17 to Pomegranate Punk and they're swatched in that order, left to right.

These were swatched on a bare arm and the pictures taken under an Ottlite.

#11 vs Bold Gold & #17 vs Pomegranate Punk

#11 vs Bold Gold & #17 vs Pomegranate Punk

and a slightly blurry one to show off the sparkle

#11 vs Bold Gold & #17 vs Pomegranate Punk

Close up on #11 and Bold Gold

#11 vs Bold Gold

Close up on #17 and Pomegranate Punk

#17 vs Pomegranate Punk

The differences are very very subtle. #11 is a more yellow toned gold whereas Bold Gold is less yellow toned, slightly more bronzy. I should note that in pictures, #11 and Bold Gold look sheerer than they are in real life. #17 and Pomegranate Punk are so close in some pictures, it's hard to tell the difference. In real life, Pomegranate Punk is a little darker and more red toned. Still though, you'd be hardpressed to tell the difference once you wear it on your eyes.

The wear time for both is quite different for me. The Aqua Cream is basically gone for me after 8 hours, no joke. It's quite strange since I know everyone touts that it's crease proof, waterproof, etc but I just didn't experience that (this really emphasizes how products that work well on me, may not on you and vice versa!). The Maybelline eyeshadows though, they've lasted 12 hours with no creasing (there's fading, more on Bold Gold's part than Pomegranate Punk but I'm still impressed. A quick note on texture, some of the Aqua Creams are really soft and squishy, while the rest are a little firmer. The two Aqua Creams I tested were on the soft and squishy side whereas the Color Tattoos are a little firmer in texture.

Hopefully this post has been useful and has aided in your decision to get the Maybelline Eyeshadows! I make no apologies for enabling everyone into getting them, especially if you can save money by getting the same colors as the Aqua Creams. Others who may find the Aqua Creams to last longer will enjoy them more than I will! My post on Tough as Taupe will be coming up once I finish testing them for a full 24 hours.

Disclaimer: I purchased these eyeshadows myself, paid with my own money. All opinions are my own.

Wet n Wild I Heart Matte Palette Eyeshadow Comparisons

Hopefully it isn't too late to post about the Wet n Wild Matte palette and hopefully some of you guys are still able to find it in your local Walgreens! When I first got the palette and swatched everything, I didn't think I had similar eyeshadows to compare to until I found a forgotten MAC palette that had lots of comparables inside.

IMG_7104

And here's how they compare in eyeshadow form.

IMG_7111

I wasn't able to find any comparable eyeshadows to the matte white and the matte terracotta peach. I also figured that many of us already own a matte black and that there wasn't a need to compare it to anything. All of the comparisons were done over Coastal Scents Shadow Worx Matte Primer, dry, and in daylight.

On the left is Wet n Wild, on the right is Kryolan's TK2 Eyeshadow. They appeared a little more similar in real life but the Kryolan is more minty than spring green.

IMG_7099

Wet n Wild on the left, MAC Electric Eel on the right. This looked very similar in the pans but there are subtle differences. The Wet n Wild eyeshadow had much more of a satin sheen to it versus the MAC eyeshadow which is more matte. Electric Eel is a little brighter in real life.

IMG_7100

I tried to find as many purples as I could to do a comparison. The order from left to right is the I Heart Matte shade, then the matte eggplant purple from the Wet n Wild Lust 6-pan eyeshadow palette, then MAC Violet Trance, and lastly the purple from Wet n Wild Dancing in the Clouds.

The I Heart Matte shade is red based versus Violet Trance which is a little more blue based. The Lust palette shade isn't similar and is way more eggplant and the Dancing in the Clouds shade is basically pathetic.

IMG_7109

I actually posted a comparison between the I Heart Matte nude shade and Wet n Wild Brulee in my swatch post of the palettes before and so I thought I'd repost them here. I Heart Matte on the left, Brulee on the right. Brulee looks a little bit lighter than the I Heart Matte shade but they're basically the same in real life.

IMG_6786

Lastly I compared the brown in the I Heart Palette to the brown in the Wet n Wild On Cloud Nine trio and nope they're not similar shades at all.

IMG_7108

If you haven't yet, scour your local Walgreens to find this palette! It's completely worth the $4.99 you'll spend!

Darling Girl Glitter Glue vs Fyrinnae Pixie Epoxy Comparison

I know that Glitter Glue and Pixie Epoxy have been compared to each other a lot and I thought I'd have a go at trying to find differences between the two. After lots of testing I will say that I honestly like them both. There are positives and negatives with both products but honestly, if I'm going to shop at Fyrinnae I'll pick up a Pixie Epoxy and if I'm low on Glitter Glue while shopping at Darling Girl, I'll pick up some of that.

I've outlined some of the differences between the two.

IMG_5293

Product Packaging, Price, and Size Options

Fyrinnae Pixie Epoxy has two different size options, a sample size jar that holds around 1.5 mL for $1.50 and a full size tube with a doefoot applicator holding 9 mL for $7.00. I should note that on the site they say the sample jars lasts for at least 10-15 full size uses. That's a very very conservative number because I recall using Pixie Epoxy for several months with a couple of uses a week. I don't own the full size so I can't comment on the full size container.

Darling Girl Glitter Glue comes in a full size squeeze tube with a squishy rubber or silicone tip holding 10 mL for $6.75. There's no sample size option. There's something I've noticed about the containers though. I used to try to have the hilt (I'm not sure of another way to describe it) of the rubbery/silicone tip pushed all the way into the container but I found I'd have problems with built up pressure and having it not dispense any product. The solution is to have the hilt of the tip not twisted fully into container but with a little bit of room between to prevent pressure build up.

Here's a picture to better explain what I mean, note the space in between?

IMG_5340

You get a little more in Glitter Glue and it's cheaper but you don't have the option of getting a sample (which I know may be important to some people, I know I'm a sample fanatic when it comes to Indies).

Product Consistency

Pixie Epoxy is a clear slightly foggy but translucent gel that applies clear and has a tacky slightly sticky texture.

Glitter Glue is white in the tube but applies clear and has a thin lotion texture.

Product Usage

Both products have the same instructions, apply a tiny bit on your eyes and wait until it dries slightly tacky and then put eyeshadow on. I noticed that because of the consistency differences I had to wait a bit longer for Pixie Epoxy to dry down whereas because Glitter Glue has a thinner, less sticky texture, it dried down a little faster.

Availability

It's important to say that for ease of purchase, it's Darling Girl over Fyrinnae. Fyrinnae is a really popular site and because of the major influx of orders, the owner occasionally closes the shopping cart to catch up. Darling Girl very rarely closes down the shopping cart and they will give a warning when they're about to. I will say that my Darling Girl orders have always stuck to the Turn Around Time, whereas I've had instances where Fyrinnae orders get to me faster than their stated Turn Around Time. That might be something to take into consideration.

How does it fare with shimmery shadows?

They work exactly the same. I found no discernible differences in application. I've done a couple of swatches with Darling Girl and Fyrinnae shades to compare. I don't own any really glittery shades from Fyrinnae so I just tried to find a super sparkly one.

In all the swatch pictures, Glitter Glue was used under the left swatch, Pixie Epoxy was used under the right swatch. Any color differences in the eyeshadows is only because of the light source, there were no discernable differences in real life.

This is Darling Girl's Smoking Gun eyeshadow.

IMG_5299

This is Darling Girl's Jeweled Taupe eyeshadow. This has red,pink, and purple glitter in it and it adhered well with both fixatives.

IMG_5313

This is Fyrinnae's Medieval Haunting.

IMG_5326

How does it fare with mattes?

In my experience, Darling Girl wins out but Fyrinnae is upfront about not working well with mattes. After all, Pixie Epoxy was meant to be a product to help minimize fallout and help with glitter adhesion with shimmery eyeshadows. Glitter Glue is meant to be used the same way. I don't think that it's a negative that Pixie Epoxy doesn't work over matte since it doesn't claim to.

How does it fare with glitter?

This is Coastal Scents' Purple Punch Glitter, size .004.

IMG_5335

Can you blend eyeshadows over it?
I personally don't have issues blending eyeshadows over Pixie Epoxy and Glitter Glue but I have heard of people having an easier time blending with Glitter Glue.

Conclusion

Personally, I've never had that much trouble with Pixie Epoxy, it had a slight learning curve that wasn't hard to master. Darling Girl was the same way. Because Glitter Glue takes less time to dry down I think it'll be easier for most people to use. At the end of it, I like both. If you want to use matte eyeshadows with a fixative, you're better off with Glitter Glue.

If you're having trouble and feel like it's a little too wet then wait a few seconds and add more eyeshadow. I love the foiled without the water look that both of them give.

Do you guys own both? Do you notice a difference?