Here's my Step by Step Picture Tutorial on how to press your loose mineral eyeshadows and powders into pans. The formula I use will be standard for most loose shimmery eyeshadows and powders and I explain the differences when pressing other textures and materials later on in the post.
I need to make a disclaimer that I cannot attest to the stability of my results so I don't know how well they'd handle being banged around in a palette and carried about! Still though, they feel quite stable and I hope that you get good results from this.
My goal from this is not only to show you how to press your loose eyeshadows, but to encourage you to try out more Indie brands. I know a lot of people don't like buying from Indie brands because most Indies only offer loose eyeshadows. I hope that this tutorial inspires you to find and press the Indie shades that you love. I adore Darling Girl Cosmetics, Fyrinnae, and Silk Naturals eyeshadows when pressed and you should experiment with more!
Gather Your Materials!
You Will Need:

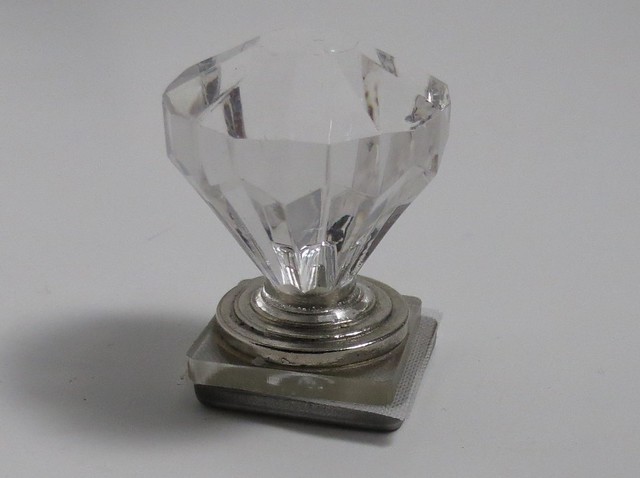
- Pans for your eyeshadows (I prefer round pans over square pans)
- a Tamping Tool (I used the tamping tool that came with the Press Pack from TKB Trading but you can also use a C-Clamp)
- a Pressing Binder (I use TKB Trading's Press-It Binder in my recipe, your results may vary depending on your binder)
- Isopropyl Alcohol (also called Rubbing Alcohol or Surgical Spirit for those in the UK.)
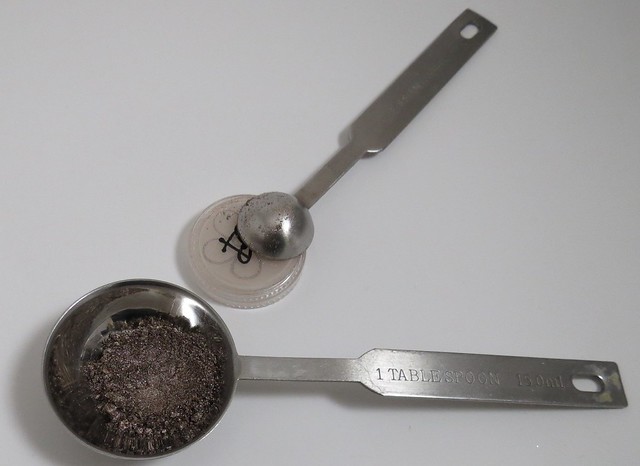
- Measuring spoons (I prefer metal measuring spoons)
- A mixing bowl (I really like using a metal tablespoon to mix in!)
- Mixing tool (I use a small spatula)
- Q-Tips
- Material to create a pattern on the eyeshadow. I prefer using Pressing Ribbon from TKB Trading but you can use an embossed paper towel, craft ribbon, or a spare piece of fabric or denim. Your choice!
- Tissue to do a mid-tamping
- Preservative: To avoid any issue with any potential molding, I suggest using TKBTrading's Cap-5 as it is inexpensive but effective. I am mixing this into the pressing binder at a weight of .1-.2% as suggested by TKBTrading.
Optional materials
- TKB MyMix Press Base (if you are not using a pre-made eyeshadow or if you want to create a stiffer eyeshadow
and of course, your product for pressing! In the picture, I have Darling Girl's Curious eyeshadow. If you use a ready made indie eyeshadow, you do not need to add to add the powdered Press Base but if you mix up your own eyeshadow with mica, you will. I will explain at the end of the post what ratio I preferred using.
Now I will be using a volumetic measure (teaspoons) to measure out the amount of eyeshadow to use. This can be potentially tricky since different eyeshadow textures will vary in density and volume. To ensure a semblance of consistency, tap the eyeshadow jar on your table or workspace a few times to help the eyeshadow settle and to remove most of the air and make it less fluffy. This way you'll get more consistent results from eyeshadow to eyeshadow, batch to batch.
My Recipe:
For pressing, my recipe for pressing loose shimmery eyeshadows :
For every 1/4 tsp of eyeshadow, add a drop of pressing binder. I highly recommend you do a test batch so you don't end up wasting all of your product with 1/4 tsp of eyeshadow to one drop of pressing binder. If you have a particularly flaky eyeshadow, you may want to use an extra drop of pressing binder per 1/2 tsp of eyeshadow.
- 1/2 tsp of eyeshadow
- two drops of pressing binder
- AND one drop of preservative*
For every 1/4 tsp of eyeshadow, add a drop of pressing binder. I highly recommend you do a test batch so you don't end up wasting all of your product with 1/4 tsp of eyeshadow to one drop of pressing binder. If you have a particularly flaky eyeshadow, you may want to use an extra drop of pressing binder per 1/2 tsp of eyeshadow.
In my experience, you need the silicones in the Pressing Binder when pressing indie eyeshadows. MAC Pigments on the other hand already come with the necessary binders within so all you need to press those is alcohol and no Pressing Binder. I would not recommend using only alcohol to press indie eyeshadows as they tend to end up VERY fragile and crumble very easily.
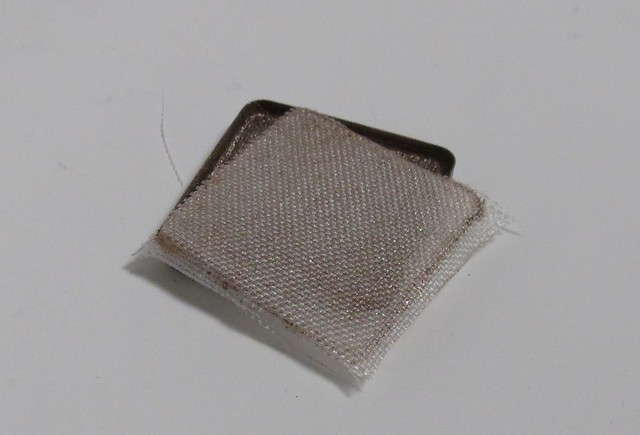
Tin or aluminum pans? Some places sell tin pans and some aluminum. I prefer tin because it's magnetic but others may prefer aluminum because it won't rust when exposed to water though it would require a thin sheet of magnetic sticker to make it work in magnetic palettes. It's your choice!
Let's get started!
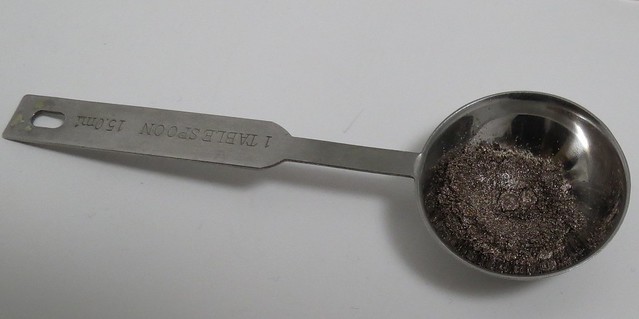
This is my jar of Darling Girl Cosmetics Curious loose eyeshadow that I'll be turning into a pressed eyeshadow with 1/2 tsp of eyeshadow measured out.
and eyeshadow measured out
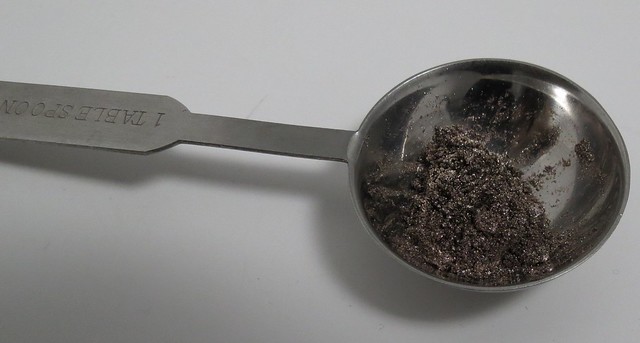
Add 2 drops of pressing binder and 1 drop of preservative. In the future, I will have already premixed my preservative into my pressing binder.
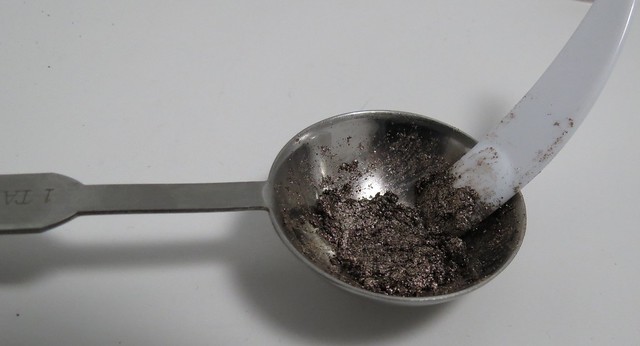
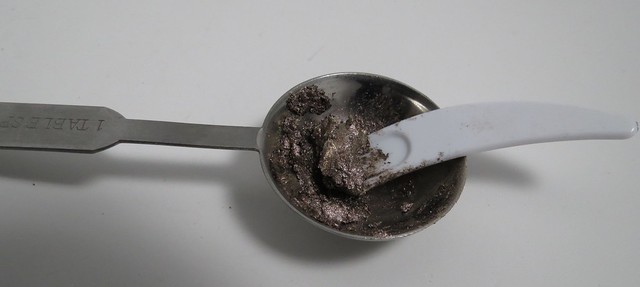
Then mix well before adding the alcohol. I wouldn't recommend doing this in a small jar like as you would be prone to spillage. I tried mixing in a silicone bowl but I had a lot of wastage since the eyeshadow would stick to the silicone. I prefer mixing in a metal tablespoon as shown.
I imagine the biggest question I'll get asked is "How much rubbing alcohol do I add?". I can't give you a definite answer but when I was mixing, it was about 20 drops per 1/4 tsp of eyeshadow. Your goal is to get it to look like wet and clumpy sand. If it's too dry, it won't bind together cohesively. It's better to have it a too wet than too dry.
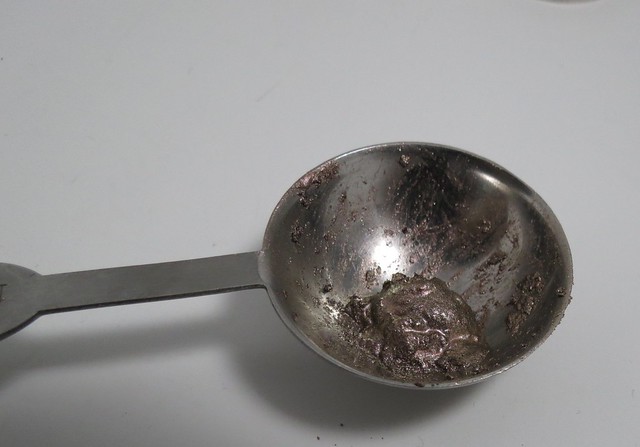
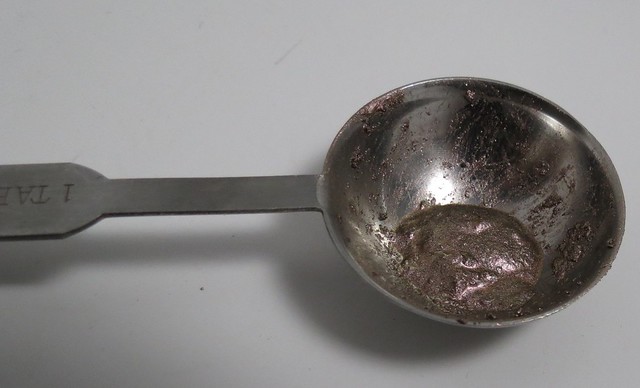
In this picture, the eyeshadow is still a little too dry.
In this picture, the eyeshadow is still a little too dry.
This next picture shows how clumpy it is but this was a little drier than I had liked so I kept adding more drops of rubbing alcohol.
This is the perfect texture to the eyeshadow. You see how the eyeshadow looks wet? When you scoop up a bit though you'll see that it's still quite clumpy together and not drippy. (That's because it's a non-Newtonian fluid that is liquidy when untouched but when you apply pressure or movement, it becomes more solid)

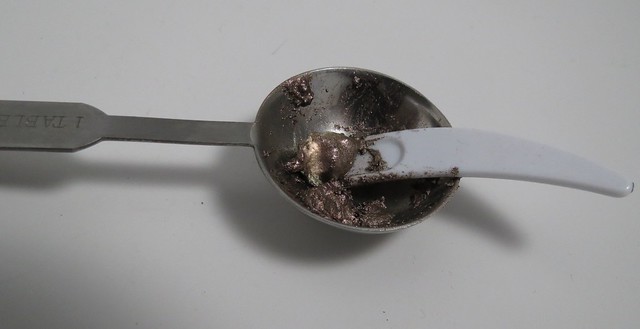
You'll know it's perfect if you gather up the eyeshadow in the middle of the tablespoon like this
then tap the tablespoon and see if the eyeshadow spreads out like this. If it does, then it's perfect.
After that, put about 1/2 of the mixture into your pan. The 15mm pans fit about 1/4 tsp of eyeshadow but since some eyeshadows can be heavier than others, the amount the pans fit may vary. The 26mm square pans can fit between 3/4 tsp-1 tsp.
Now take a piece of tissue now and use that to tamp down gently (not with your full weight!). If you're using a C-Clamp, gently crank it so you exert enough pressure to push the tile down onto the eyeshadow but not too much (don't crank it to the max, you only need to put slight pressure)
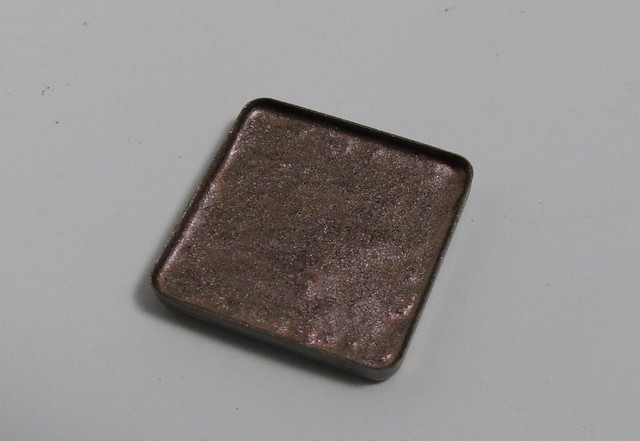
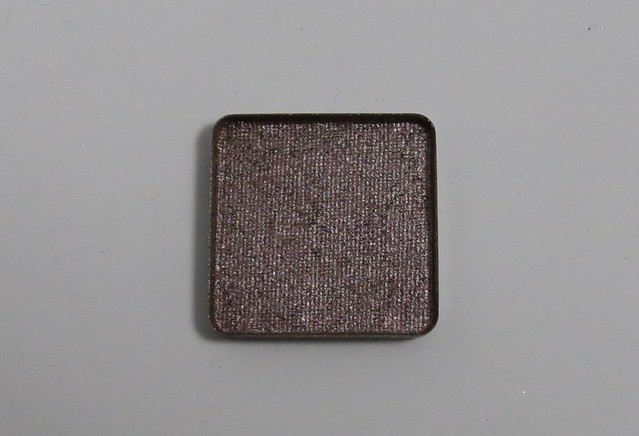
After that, you should have this!
Then fill the rest of the pan with the last 1/2 of the eyeshadow.
Then tap it to get it to spread in the pan so it'll be evenly tamped.
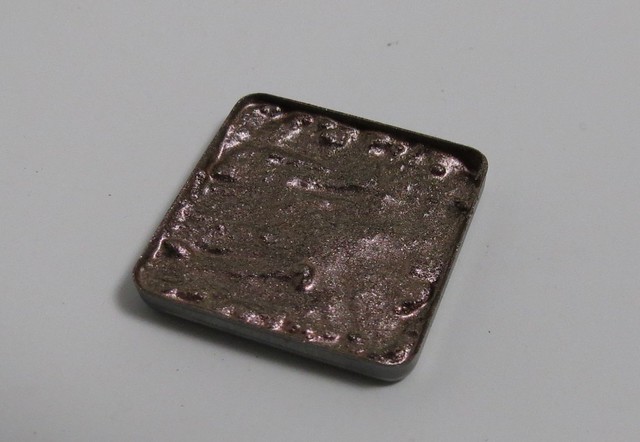
This is the time where you will use the material with the pattern you want to emboss on your eyeshadow (I cut out a piece of pressing ribbon). This last step is when you'll want to tamp down with your weight to ensure a cohesive eyeshadow! Use the most of your weight/force of the clamp.
This is the time where you will use the material with the pattern you want to emboss on your eyeshadow (I cut out a piece of pressing ribbon). This last step is when you'll want to tamp down with your weight to ensure a cohesive eyeshadow! Use the most of your weight/force of the clamp.
When tamping, you'll squish out the extra alcohol so tamp over a paper towel so as not to get your surface wet.
The piece of ribbon should be soaked and none of the eyeshadow should be sticking to the ribbon.
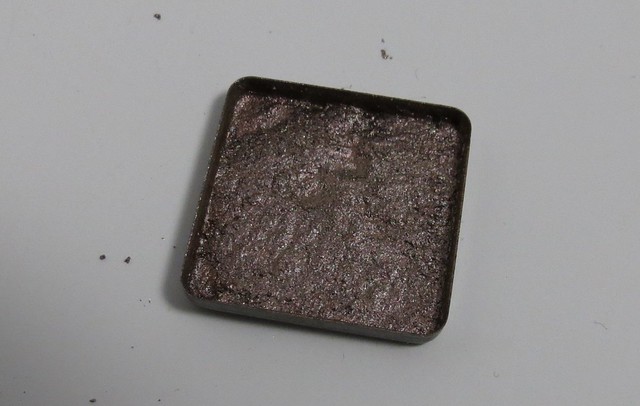
Voila! You've got your own handy dandy pressed eyeshadow! Let it try overnight to ensure the alcohol fully evaporates. If you're having difficulty fitting all the eyeshadow into the pan, dampen the eyeshadow with a drop of alcohol and gently press to compress it and create more space.
Here's my overview on different eyeshadow textures and how they take to pressing.
Glittery loose eyeshadows: They seem to take well to pressing, the glitter ends up dispersed evenly and the eyeshadows apply smoothly.
Sparkly loose eyeshadows: These can be hit or miss depending on the sparkle level. Fyrinnae's Newcastle was great pressed but Sugarpill's Goldilux (which is the sparkliest eyeshadow I own) was better loose. I think eyeshadows with high content sparkle may not suit well with the pressing method because the process may alter the distribution of sparkle within the eyeshadow. I ended up with more fallout using the pressed version than the loose version because the sparkle in the pressed version wasn't mixed evenly or didn't adhere well to the eyeshadow the way it was in the loose version.
Differences when pressing a homemixed mica
I really like some of the TKB Trading mica colors so I got their MyMix Press Base and experimented a little. I got the best results doing a 80:20ish ratio of mica to pressing base. I tried pressing the mica by itself, but it yielded a soft eyeshadow, a little softer and fragile than I'd like it to be. The addition of the Press Base, even though it was a small amount, helped improve the stiffness and stability. I didn't use the Press Base with my premade eyeshadows because those have already had bases added to them. If you still find them to be too soft after pressing, add another drop of Press-It Binder and you can repress it!
After that, the procedure was the same. I used the same amount of pressing binder and glycerin and got the same results!
Difference when pressing a matte eyeshadow
You can certainly press a matte eyeshadow but before you press a matte eyeshadow, you'll want to check the ingredients list. If it's mica based, it'll most likely turn out fine but if it is ultramarine, oxide, or colorant based (any of the powders under this category), keep it loose! If you want to mix up your own matte eyeshadow, it has to be mica based versus colorant based.
I used the same amount of pressing binder (2 drops of pressing binder per 1/2 tsp of product) as in my original recipe. The texture you want to get with the mixture should be a slightly soft, almost mousse like.
Pressing a matte product is different because you want to press it while it's still damp and slightly tacky (much more than with your normal pressing) in order to get crisper hetchmarks and to build a cohesive pressing with minimal cracking. I've pressed a matte product when it was semi dry the way I do with my shimmery products but that resulted in a lot more cracking than when I did it when it was much damper.
As always, I gently pressed down in the center to ensure no air bubble. You may not encounter this problem when using round pans, I think the square pans are just more liable for it.

All systems go

Hopefully you can see how much liquid has saturated the pressing ribbon and how damp it is.

and hopefully, you can see how clean and crisp those hetchmarks look!

Mattes get darker when the alcohol is added but it dries back to its original color.

Differences when pressing mattes with sparkle loose eyeshadows:
Much like matte eyeshadows, you must keep the ingredient list in mind when pressing mattes with sparkle. Check the ingredients list to ensure that it's mica based versus colorant based. I pressed Sugarpill Darling loose eyeshadow and it actually turned out well. I tried out pressing Sugarpill Paperdoll but since it's ultramarine based, it turned out hard with no payoff.
With Darling, I didn't have any issues with texture or pigmentation afterwards and in fact, I liked it better pressed! The only thing is that some of the sparkle and float up and settle on top making the pressed eyeshadow look slightly different than the loose eyeshadow. However, your mileage may vary with these types of eyeshadows so I'd do a test batch first.
The pressed version looks extremely blue but was true to life after the first use.

Differences when pressing a glitter
Yes, you can in fact press a glitter! When it came to it, I liked to use 2 drops of pressing binder for my mixture then follow my normal procedure when it comes to pressing. If you're the type of person who likes to apply glitter using your finger to pat some on in an area, this is a handy way of having carrying multiple glitter colors. If you like applying glitter with a brush and mixing medium, I'd stick to it loose. This was Coastal Scents Purple Punch Glitter. I'm not sure why they look to be two different colors, they really aren't in real life!

Differences when pressing silica spheres
Yes, you can press the silica spheres/HD powder into a more compact size! My recipe is 1/4 tsp of silica spheres to 3 drops of pressing binder. You'll get a product that isn't too fragile or soft but you'll still be able to pick up product when you take a brush to it. Interestingly enough, this didn't crack on me and I'm glad for that!

For those pressing Fyrinnae eyeshadows
Some brands such as Fyrinnae already contain binder in the eyeshadow formula. In Fyrinnae's case, there's more binder in the sparkliest shades, less in the Arcane Magic, and very little in the satin shades. You may want to experiment with less or more binder in some of the eyeshadows.
Some brands such as Fyrinnae already contain binder in the eyeshadow formula. In Fyrinnae's case, there's more binder in the sparkliest shades, less in the Arcane Magic, and very little in the satin shades. You may want to experiment with less or more binder in some of the eyeshadows.
By the way, I know I keep mentioning TKB Trading but that's because they're the only company whose products I've been acquainted with. I'm not affiliated with them in any way nor do they know who I am. BFTE Cosmetics sells pressing materials and Coastal Scents does too but I don't have any experience with them. If you have, please leave a comment so others can read about it!
I hope you've found this post to be useful! If you have any questions, please leave me a comment or email me (my contact info is listed under "About/Contact Me". Do be sure to check out my Troubleshooting post where I've answered a lot of questions about the process! I really do hope you'll want to experiment with pressing, it's quite fun!


You are the greatest. That is all.
ReplyDeleteThank you so much for this! So helpful and I can't wait to start pressing!
ReplyDeleteThis is **awesome** Mai!
ReplyDeleteThank you for taking the time to write this up for us!!
Long post, but super informative!! I want to try this, though there's no TkB trading or anything here in Nz. Ahall hunt around & try this out when i can :D thank for the tutorial~
ReplyDeleteJen, TKB Trading is online (not a brick-and-mortar store) at http://www.tkbtrading.com/index.php?maincat=10. You can get pretty much everything you need from them :-)
DeleteGreat tutorial! :)
ReplyDeleteI loved this, and thanks becuase now I might become a total hermit, staying in my room pressing eyeshadows lookin' like a mad scientist from breaking bad. HAHAHA! This was an awesome post, and very informative. I have sooooo many little jars and its getting ridiculous! Have you tried pressing two colors side by side? I think that would be something I would try to fill pans/save space. I will refer back to this when I get a pressing kit...haven't seen the last of this zombie!
ReplyDeleteJill did this amazing post showing how she pressed two colors side by side http://a-crazy-peach.blogspot.com/2011/06/powder-pressing-insanity.html I think that if you're going to do this, the mixture will have to be less dry to prevent the colors bleeding into each other.
DeleteYou did such a great job with this post! So much great information! I may have to try pressing some silica spheres and see how that works out! And yay for using Non-Newtonian Fluid! Very approperiate here! :)
ReplyDeleteoh god I didn't know it was non-newtonian. Now I'm just going to be adding this stuff to my loose powder and playing with it. If I could afford it, I wouldn't be kidding. :|
ReplyDeleteMai, I'm really impressed at the detail and clarity with which you have presented all parts of this topic! Brava!
ReplyDeleteAwesome, Mai! You just helped me press my first e/s ever. The e/s came out good (it was unpigmented to begin with, haha, used a least favorite e/s for testing) so I plan to press all my loose e/s this weekend. BUT... my hd powder went all cracked and ugly when it started to dry!! Any ideas? :( (I used the elf one for testing)
ReplyDeleteHmm pressing it while it was still pretty damp didn't help?
DeleteHi Mai!! first thanks for this post. i've been looking for a good pressing tutorial and this was the easiest to follow. second, i also have the goldilux loose shadow from sugarpill. even though i saw where you tried to press yours and didn't like the result, i decided to give it a whirl anyway. i didnt have any glycerin so i just used two drops of the tkb pressing medium and added alcohol to get the consistency you descibed. i actually got a really great result. it still maintained its original sparkle when swatched and when i applied it to my eye i had little to no fallout. i took pictures but i don't see a way to link them : ( what i did have trouble pressing though were royal sugar, stella, and paperdoll from sugarpill. any advice? do you think the glycerine would actually help these to produce a better pressed shadow?
ReplyDeleteHmmm honestly, i'm not sure. Royal Sugar and Paperdoll are quite matte and you may have to try pressing them when they're a little more damp to ensure a more cohesive product, did you try doing that (you didn't mention it so I thought I'd ask). Perhaps also try that with Stella? I don't own Stella so I can't attest to the texture and if it's really matte with sparkle or a shimmery eyeshadow.
Deletestella is also a matte base with sparkles like royal sugar and paperdoll. i actually tried for the same wet sand consistency with these but it ended up looking like paste. when they were dry, they looked great in the pot but when i tried swatching them there was little to no color payoff. i guess until i figure out something better, i'll use these loose for now : )
DeleteHi Mai,
ReplyDeleteI hit pan on a matte blush and it looks like it's going to crumble in the near future. I'd like to re-press it into a smaller pan. Talc is the first ingredient. I'm tempted to re-press it using just alcohol since I don't have any pressing medium; however, I'm scared it's going to turn rock-hard and have no payoff.
Do you have any experience re-pressing broken matte eyeshadows or blushes? What do you recommend I do? If it helps, it's a Cargo blush. The ingredients are: Talc, Lecithin, Nylon-12, Silica, Polyethylene, Zinc Stearate, Bismuth Oxychloride, Castor Oil, Silk Powder, Dimethicone, Coco Caprylate/Caprate, Trimethylsiloxysilicate, Imidazolidinyl Urea, Methylparaben, Ethylparaben, Propylparaben. May Contain: Calcium Silicate, Methicone, Mineral Oil, Ultramarines, Mica, Titanium Dioxide, Methylcellulose, Polysorbate 85, Iron Oxides, Carmine, D&C Red 6 Barium Lake, D&C Red 7 Calcium Lake, D&C Red 33 Aluminum Lake, D&C Red 36 Barium Lake, D&C Yellow 6 Aluminum Lake, D&C Yellow 5 Zirconium Lake, FD&C Yellow 5, FD&C Yellow 6
Please help me save my favourite (and 1st) blush!
Amazing tutorial Mai, thankyou for posting this up, I have the TKB and Sugarpill Shadows and been looking for a tutorial to give it a whirl. YOu are a life save and also a HUGE money saver for me now... why go out when I can sit at home and do this while I am trying to save xx
ReplyDeleteWhat makes me confused also on TBK website is that in your picture you have a base on plastic bag and liquid do you use both ?
ReplyDeleteI only used the Pressing Base when I was mixing my own mica for pressing, I didn't use any of the Pressing Base when pressing my purchased shadows. Hope this clarifies things!
Deletethanks for the tutorial! I love your blog and all the reviews you do on different products.
ReplyDeleteI have a question! What if the ingredient list looks like this Mica, Titanium Dioxide, Magnesium Stearate, Magnesium Myristate, Ultramarines and Iron Oxides. Would Mica be the base and it press good and have good color pay off? Or since it still has iron oxides and Ultramarines in it would it not press well and have bad color pay off?
ReplyDelete